The Real Cost of Plumbing Errors in Detroit’s Historic Neighborhoods
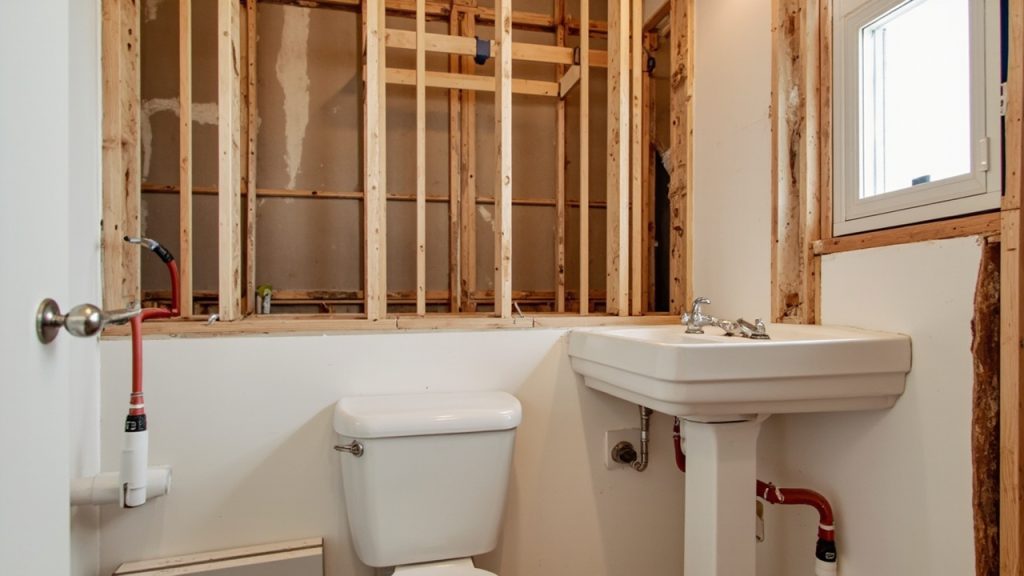
Hubbard Farms is one of Detroit’s most architecturally significant neighborhoods. The craftsman bungalows and brick two-flats along Vernor Highway and Campbell Street were built with quality, but their plumbing systems are pushing 80 to 100 years old. When homeowners gut a bathroom without understanding what’s behind those walls, the results can be expensive and genuinely dangerous.
A bathroom remodel gone wrong doesn’t just cost you a repair bill. It costs you subfloor replacement, mold remediation, structural drying, and sometimes a drywall tear-out across multiple rooms. We’ve responded to water damage calls in Hubbard Farms where a single weekend’s worth of DIY plumbing work turned into a six-week restoration project.
This guide covers the specific plumbing mistakes we see most often in Detroit’s historic housing stock, what they cause, and when you need to stop the project and call a professional.

Mistake 1: Improper Venting and S-Traps That Invite Sewer Gas
The P-trap under your sink or tub holds a small amount of water. That water creates a seal that blocks sewer gas from entering your living space. An S-trap, which was common in older Detroit homes, siphons that water seal dry every time the drain runs. Once the seal is gone, hydrogen sulfide and methane gas can enter the bathroom freely.
The Michigan Residential Code requires every fixture to have a vented P-trap connected to the drain-waste-vent system. That vent pipe equalizes air pressure so the trap water doesn’t get sucked down. When homeowners skip the vent or use an S-trap because it’s easier to retrofit, they’re creating a code violation and a health risk.
In older Hubbard Farms homes, the existing vent stack may be cast iron and partially corroded. Before you reroute any drain lines, a licensed plumber should camera-inspect that stack. We’ve seen renovations where the new fixtures were installed correctly but connected to a vent stack that was 60 percent blocked with rust scale. The result was slow drains, gurgling sounds, and recurring sewer gas odors that the homeowner blamed on the new fixtures.
What Happens When Venting Fails
- Sewer gas odors that come and go depending on weather pressure changes
- Gurgling sounds from other fixtures when the tub drains
- Slow drainage that gets worse over time as biofilm builds on rough pipe walls
- Failed inspection by Detroit’s Building Safety Engineering and Environmental Department (BSEED), which will require a permit revision and re-inspection
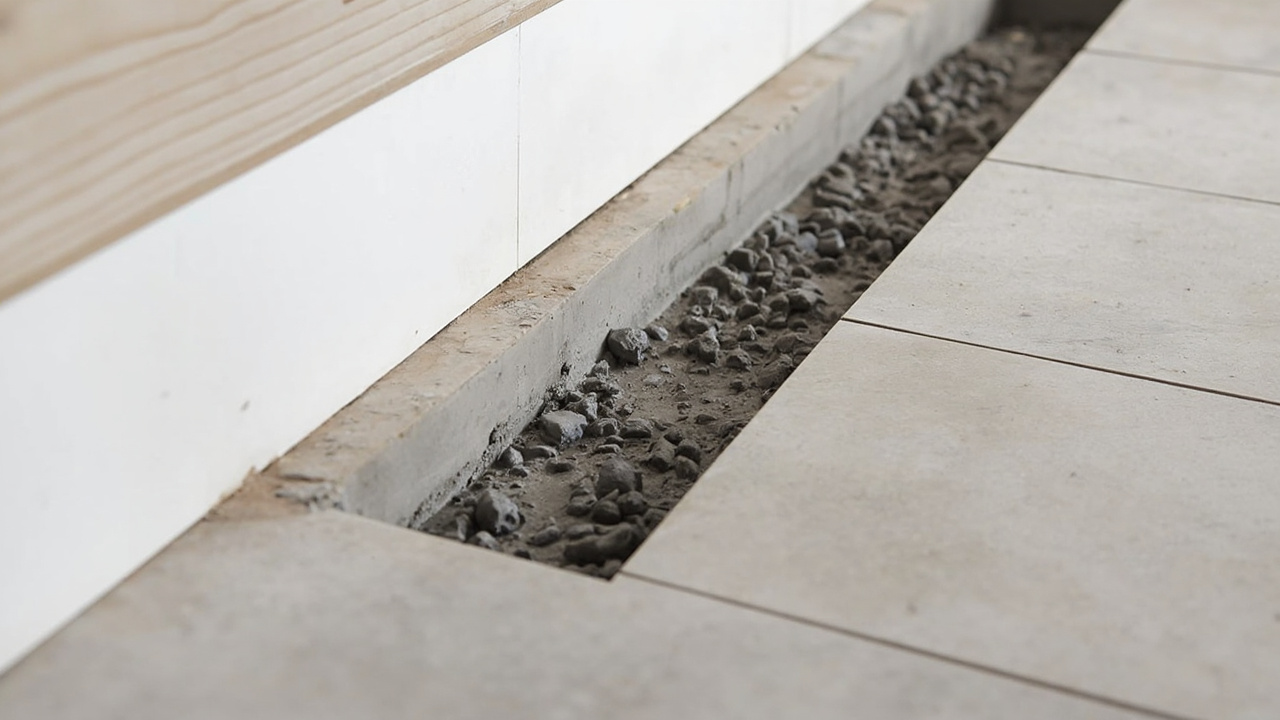
Mistake 2: Shower Pan Installation Without the Pre-Slope
This is the number one cause of subfloor rot in bathroom remodels across Detroit. A mortar-bed shower pan is not flat. It has two slopes built into it. The pre-slope sits beneath the liner and directs any water that seeps through the tile grout toward the weep holes in the drain body. The finished mortar bed above the liner slopes toward the drain at the surface level.
Many DIYers and even some general contractors skip the pre-slope entirely. They pour flat mortar, drop the liner on top, then pour the finish bed. This looks correct from above. But the moment water gets through a cracked grout joint, it pools on top of the liner with nowhere to go. Over months, that standing water saturates the mortar bed, wicks into the subfloor, and starts rotting the joists.
The Michigan Residential Code requires shower liner material to be flood-tested for 24 hours before the finish mortar is poured. The test involves plugging the drain and filling the pan to the height of the liner dam. If the water level drops, the liner has a leak. Most homeowners and contractors skip this test because it adds a day to the schedule. That shortcut routinely costs thousands in subfloor and joist replacement down the line.
We’ve documented cases in the West Village and Woodbridge neighborhoods where bathroom tile looked perfect from the surface while the floor joists directly below had lost 40 percent of their structural capacity to rot and black mold growth that bleach could never reach.
Mistake 3: Mismatched Pipe Materials and Electrolytic Corrosion
Detroit’s pre-war housing stock is full of galvanized steel supply lines. When homeowners update to copper or PEX, the transition point becomes a failure zone if it’s not handled correctly.
Connecting copper directly to galvanized steel without a dielectric union causes galvanic corrosion. The two dissimilar metals create a small electrical charge when water passes between them, and the galvanized steel corrodes at an accelerated rate right at the joint. Within a few years, you get pinhole leaks inside a wall cavity. Those leaks run silently for months. By the time you smell the mold or notice the soft spot in the floor, you’re looking at a significant remediation project.
PEX piping is now the standard choice for supply line replacement in Detroit’s older homes because it doesn’t corrode, handles freeze-thaw cycles better than rigid copper, and costs less to install in tight wall cavities. But PEX connected to existing galvanized steel still requires a proper transition fitting, and the galvanized pipe upstream of the transition needs to be assessed for interior scale buildup that will restrict flow and harbor bacteria.
| Pipe Material | Expected Lifespan | Common Detroit Problem | Transition Requirement |
|---|---|---|---|
| Galvanized Steel | 40 to 70 years | Interior scale, pinhole leaks, low pressure | Dielectric union to copper or brass adapter to PEX |
| Copper | 50 to 70 years | Pinhole corrosion from acidic Detroit water | Dielectric union to galvanized, direct to PEX with crimp fitting |
| PEX | 50 plus years | Incorrect crimp tool sizing, UV degradation if exposed | Brass adapter to copper or galvanized |
| Cast Iron Drain | 80 to 100 years | Interior tuberculation, partial blockages, cracked hubs | Fernco flexible coupling to ABS or PVC |
Mistake 4: Getting the Drain Line Slope Wrong
Drain lines are not a guess-and-go situation. The Michigan Residential Code is specific about slope requirements for horizontal drain pipes. Too little slope and solids settle in the pipe, creating blockages and standing water. Too much slope and the liquid runs ahead of the solids, leaving waste behind that hardens and restricts the pipe.
| Pipe Diameter | Minimum Slope per Foot | Maximum Slope per Foot | Notes |
|---|---|---|---|
| 1.5 inch (lavatory) | 1/4 inch | 1/2 inch | Most common in older Detroit bungalows |
| 2 inch (shower, tub) | 1/4 inch | 1/2 inch | Required venting within 5 feet of trap |
| 3 inch (toilet) | 1/8 inch | 1/4 inch | Connects to 4-inch main stack in most Detroit homes |
| 4 inch (main stack) | 1/8 inch | 1/4 inch | Often cast iron in homes built before 1960 |
In Detroit’s older homes, floor joists run in specific directions that may not align with where you want to route a new drain. Homeowners cut notches into joists to route pipe at the angle they want, weakening the structural floor system. The correct approach is to consult the joist span, use proper joist hangers if you must cut, and plan the drain route around the structure rather than through it.
Mistake 5: Skipping Shut-Off Valves at Every Fixture
Building code requires isolation shut-off valves at each fixture’s supply connection. This isn’t just a code box to check. It’s what lets you stop water flow at the toilet or sink without shutting down the whole house supply. In an emergency, that valve is the difference between a minor leak and a flooded floor.
In Hubbard Farms and neighboring Mexicantown, we routinely respond to calls where a supply line failed at a toilet connector and there was no functioning shut-off at the base. The homeowner had to run to the basement to kill the main, and by the time they got back up, the bathroom floor had two inches of standing water soaking through to the ceiling below. Understanding how quickly water damages flooring materials makes this mistake painfully clear.
Always install new quarter-turn ball valves during a remodel. The old compression stop valves in Detroit’s aging homes are often seized and will fail when you need them most.
Mistake 6: Wax Ring Failure During Toilet Relocation
Moving a toilet even a few inches requires cutting and repositioning the floor flange. That flange must sit at finished floor height. If the new tile raises the floor level and the flange sits below it, a standard wax ring won’t create a reliable seal. Sewage and water will leak into the subfloor with every flush, often for months before any visible sign appears on the surface.
The fix is a double-stack wax ring or a wax-free flange extender that brings the seal point up to finished floor level. This is a cheap part. Skipping it is an expensive mistake. We’ve pulled toilets in Hubbard Farms homes where the subfloor plywood had completely delaminated and the joists below showed active Stachybotrys growth, all from a flange that sat a half-inch too low.
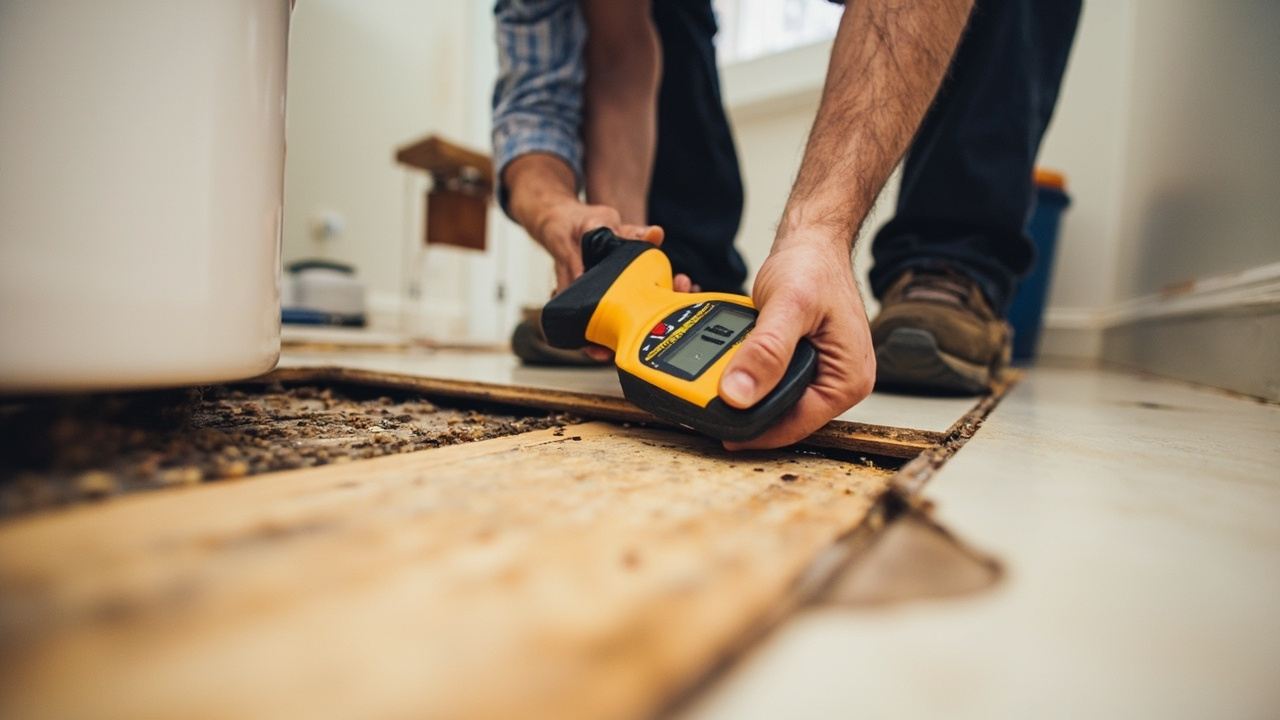
Signs Your Bathroom Remodel Has Already Caused Hidden Water Damage
Plumbing failures behind tile and drywall don’t announce themselves immediately. By the time you notice visible damage, the structural and microbial situation behind the wall is often significant. Watch for these specific indicators.
- Spongy or soft spots in the floor near the toilet, tub, or shower threshold
- Grout lines that crack or crumble repeatedly even after resealing
- Musty odor that persists even after cleaning all visible surfaces
- Peeling paint or bubbling drywall on the ceiling of the room below the bathroom
- A water bill that has increased without any change in usage habits
- Tile that sounds hollow when tapped, indicating the mortar bed has separated
- Visible staining at the base of the toilet or along the tub surround seam
If you’re seeing two or more of these signs, the damage is likely already behind the wall. A moisture meter and thermal imaging camera can map the extent without tearing out tile blindly. This is standard practice in professional IICRC-certified water damage assessments, and it saves homeowners from unnecessary demo while still finding every wet zone.
Detroit Building Permits and Why They Protect Your Insurance Claim
BSEED requires a permit for any work that involves moving, adding, or replacing plumbing lines in a bathroom remodel. This includes rough-in changes to drain, waste, and vent systems, as well as supply line relocations.
Many homeowners skip permits to save time and fees. This creates a serious problem if a water damage claim follows. Your homeowner’s insurance company will request documentation during the claims process. If unpermitted work contributed to the loss, they have grounds to deny the claim partially or entirely. Getting your insurance company to pay a legitimate water damage claim is already a process that requires documentation and follow-through, as detailed in resources on navigating Detroit home insurance for water restoration.
A BSEED rough-in inspection happens before walls are closed. The inspector checks trap locations, vent connections, slope on drain lines, and shut-off valve placement. Passing that inspection creates a paper record that your remodel was done to code. That record is worth far more than the permit fee if you ever need to file a claim.
You can confirm current permit requirements and fee schedules directly through BSEED’s official portal.
When a Plumbing Mistake Becomes a Restoration Emergency
There’s a clear line between a plumbing correction and a water damage restoration job. If water has been present behind tile or under a subfloor for more than 48 to 72 hours, mold colonization is a realistic concern. At that point, fixing the plumbing is step one. Drying the structure, testing for Stachybotrys, and replacing saturated building materials is step two.
Restoration work requires different equipment and different expertise than plumbing repair. Industrial desiccant dehumidifiers and air movers are not the same as renting a fan from a hardware store. Moisture readings need to be documented at multiple depths in the subfloor, and clearance testing should confirm the structure has returned to baseline before new flooring goes down. If wet carpet is involved in an adjacent room, knowing whether salvage is possible depends on contact time and contamination level.
The cost gap between catching a plumbing error during rough-in inspection versus discovering the resulting water damage six months later is significant. Mold remediation in a bathroom with subfloor involvement typically requires full tile demo, liner removal, joist treatment, and subfloor replacement before any finish work can begin. That’s a project that compounds every week it goes unaddressed.
A Pre-Drywall Plumbing Checklist for Hubbard Farms Homeowners
Before you close up any wall or floor, verify each of these items is complete and inspected.
- All P-traps are properly vented and connected to the drain-waste-vent stack
- No S-traps are present anywhere in the system
- Shower liner flood test completed and passed for 24 hours
- Pre-slope confirmed under shower liner at 1/4 inch per foot toward drain
- Weep holes in drain body are clear and functional
- All dissimilar pipe material transitions use appropriate dielectric unions or adapters
- Drain line slope confirmed with a level at 1/4 inch per foot on 1.5 and 2-inch lines
- Toilet flange sits at finished floor height
- Quarter-turn ball valves installed at every fixture supply connection
- BSEED rough-in inspection scheduled and passed before any drywall or backer board goes up
- Pressure test completed on all supply lines before walls are closed
Getting Professional Help Before the Damage Compounds
If your Hubbard Farms bathroom remodel has already moved past rough-in and you’re questioning whether the plumbing was done correctly, don’t wait for a visible sign to confirm your concern. A moisture inspection now costs a fraction of what subfloor replacement and mold remediation will cost in six months.
We work with homeowners across Detroit’s historic districts, from Southwest Detroit to North Rosedale Park, and the pattern is consistent. The projects that go smoothly are the ones where the homeowner insisted on proper permits, a licensed plumber for rough-in work, and a pre-drywall inspection before closing the walls. The projects that become restoration jobs are the ones where those steps got skipped to save time or money.
If you’re already seeing signs of water intrusion from a recent remodel, or if you want a professional moisture assessment before you close your walls, contact us directly. Catching this early is always the right call. You can also review what to expect from a water damage insurance claim process so you’re prepared if the situation has progressed further than expected.