
How to Save Wet Photos After a Detroit Flood — A Step-by-Step Recovery Guide
Your basement just flooded. The water is receding. And sitting in a cardboard box at the bottom of the stairs is every photo from your kids’ childhoods, your parents’ wedding album, and a folder of original documents you can never replace. This is the moment where every minute counts.
Detroit basements flood. It happens in Grosse Pointe when storm drains back up. It happens in Dearborn after heavy spring rain overwhelms aging sewer lines. It happens in Rosedale Park and Bagley when the Detroit Water and Sewerage Department (DWSD) system gets overwhelmed. If it happened to you today, this guide is what you need right now.
The First 48 Hours Are Everything
Mold spores begin colonizing wet paper and photo emulsion within 24 to 48 hours. In a Detroit summer, where basement humidity often runs above 70 percent, that window shrinks even further. Ink bleeds. Emulsion lifts. Silver halide prints begin to fuse together as they dry, and once that bond sets, it is permanent.
The goal in the first two hours is not to restore anything. The goal is to stop the damage from getting worse.
Here is what you do immediately:
- Stop the water source if it is still active. Turn off the main shutoff or call a plumber.
- Do not step into standing water if there is any chance of electrical hazards.
- Move wet documents and photos to a clean, dry area on a flat surface — never stack them.
- Turn on a fan or dehumidifier to reduce ambient moisture. Do not point it directly at wet photos.
- Photograph the damage with your phone before touching anything. You will need this for your insurance claim.
- Do not open wet photo albums yet. Forcing apart pages bonded by capillary action will tear the prints.
If you have more wet photos than you can process in the next few hours, do not try to dry them all at once. Freeze them instead. More on that below.
Step-by-Step DIY Photo Salvage for Different Print Types
Not all wet photographs respond the same way. The recovery process depends on what type of print you are dealing with. Treating a Polaroid the same way you treat a silver halide print from the 1980s is one of the most common mistakes homeowners make.
Silver Halide Prints (Standard Color and Black-and-White Photos)
These are the most common prints found in Detroit family albums. They have a gelatin emulsion layer that swells with water and becomes extremely fragile.
Step 1 — Careful Removal. Slide a photo out from between other wet items by supporting it fully from below. Never grip a wet print by the edges and pull. The emulsion will tear.
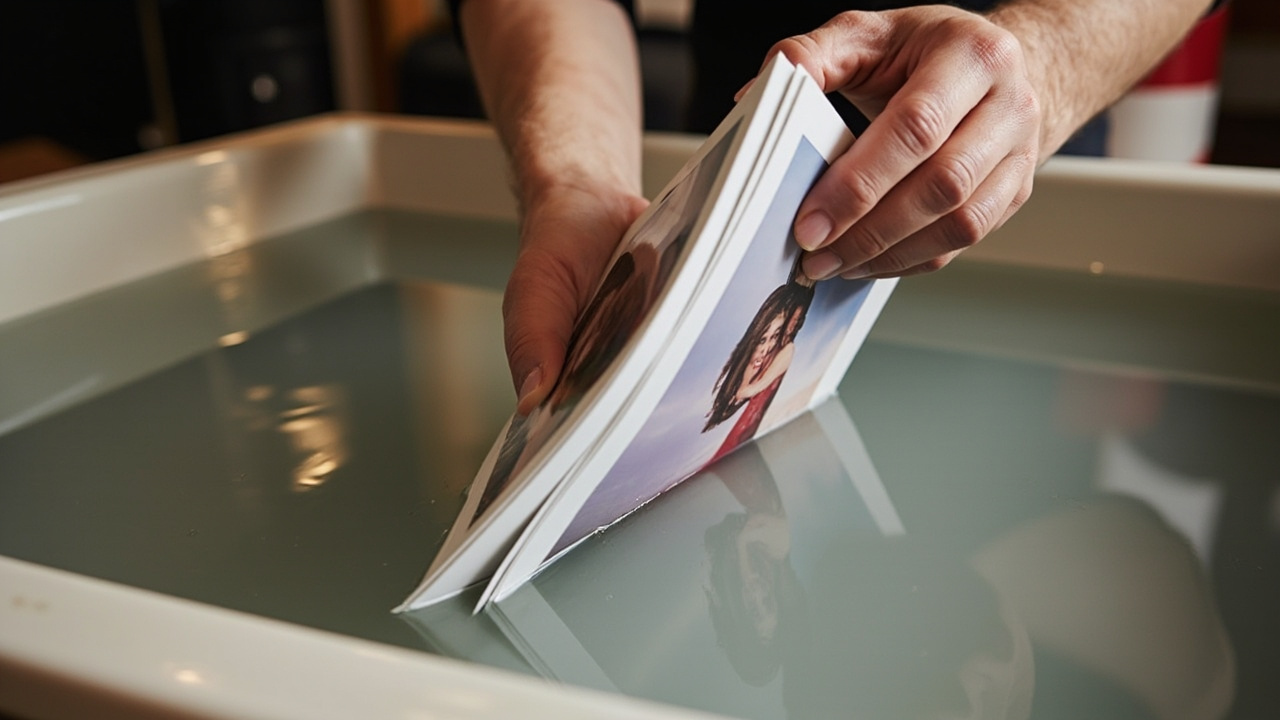
Step 2 — Rinsing. Fill a clean container with distilled water (not tap water, which contains minerals and chlorine that can stain or streak the emulsion). Gently place the print face-up and let it float. Do not rub or scrub. The water loosens debris naturally.
Step 3 — Air Drying. Place prints face-up on a clean white towel or blotting paper. Leave space between each photo. Let them dry at room temperature. Avoid direct sunlight, which fades emulsion, and avoid hair dryers, which cause rapid curling and cracking.
Polaroid and Instant Prints
Polaroids have a plastic-coated surface that offers some water resistance, but the internal dye layer is vulnerable. Do not rinse Polaroids in water. Gently blot the surface with a clean, soft cloth and air dry face-up. Never stack them wet.
Kodachrome Slides and Negatives
Kodachrome slides are actually more stable when wet than when partially dry. Keep them submerged in clean distilled water until you can deal with them properly, or until a professional can handle them. Do not let slides air dry before rinsing — drying grit into the emulsion causes permanent scratches.
Framed Photos Behind Glass
Do not try to peel a wet photo away from glass. The emulsion will come off with it. Keep the frame flat, glass side up, and let a professional handle the separation. This is one situation where DIY almost always causes more damage.

When to Freeze Your Photos Instead of Drying Them
This is the technique most homeowners have never heard of, and it is the one that saves the most irreplaceable items.
If you have more wet photos than you can process in the next two to four hours, or if mold has already begun to appear, freezing is the right call. Here is why it works. Freezing halts mold growth completely and stops the emulsion from continuing to deteriorate. It buys you time — days, sometimes weeks — to process the photos properly or hand them off to a professional restoration service.
How to freeze wet photos correctly:
Place a sheet of wax paper or freezer paper between each wet print. Do not let them touch each other. Lay them flat in a zip-close freezer bag and place them in a standard household freezer. Do not stack bags on top of each other without support underneath.
When you are ready to thaw them, move the bag to the refrigerator and let them thaw slowly over 24 hours. Never thaw wet photos at room temperature all at once — the sudden temperature change causes condensation and emulsion damage.
Professional restoration companies use a more advanced version of this process called lyophilization, or vacuum freeze drying. This technique removes moisture from frozen photos through sublimation — converting ice directly to vapor without passing through a liquid stage. It is the same technology used to preserve archival documents and is especially effective for high-value collections, including old negatives and original documents.
Common Mistakes That Ruin Wet Photographs
Fifteen years of responding to flooded homes across the Detroit metro has shown the same errors over and over. These are the ones that cause permanent, irreversible loss.
| Mistake | What Actually Happens | What to Do Instead |
|---|---|---|
| Using a hair dryer on wet prints | Rapid heat causes curling, cracking, and emulsion separation | Air dry at room temperature with gentle air circulation |
| Rubbing or scrubbing the photo surface | Gelatin emulsion is soft when wet and will smear permanently | Float in distilled water, never touch the image surface |
| Prying open a stuck photo album | Adhesive pages bond prints together — forced separation tears the image | Submerge in clean water to loosen adhesive gradually |
| Stacking wet prints to save space | Photos dry fused together — pulling apart destroys both images | Lay flat with separation between each print |
| Waiting more than 48 hours to act | Mold spores embed into the emulsion and cannot be removed without destroying the image | Freeze immediately if you cannot process within two hours |
| Using tap water to rinse prints | Chlorine and minerals streak and stain the emulsion layer | Use distilled water only |
Saving Wet Documents, Passports, and Important Papers
Documents require a slightly different approach than photographs. Ink on paper is water-soluble. The longer a document stays wet, the more text bleeds and fades.
For critical documents — passports, birth certificates, deeds, social security cards — the priority is the same as with photos. Rinse lightly with distilled water if there is debris on the surface, then place face-up on a clean towel or blotting paper. Do not use paper towels, which leave fibers embedded in the paper.
For documents with significant sentimental or legal value, freezing is the right call here too. Wrap documents in wax paper individually before freezing. A professional can use the same vacuum freeze drying (lyophilization) process that is used for photo emulsion to restore documents with minimal additional loss.
For anything that constitutes a legal record — property deeds, wills, business contracts — contact an IICRC-certified restoration company immediately. These firms have access to document recovery specialists and freeze drying equipment that far exceeds what any homeowner can replicate at home.
If you are dealing with a flood loss that involves insurance, make sure to document everything before you start moving items. Read through our guide on how to get your Detroit home insurance to actually pay for water restoration so you understand what documentation your adjuster will need.

Photo and Document Recovery — DIY vs. Professional Service
| Scenario | DIY Viable? | Recommended Action | Time Sensitivity |
|---|---|---|---|
| Less than 20 loose prints, no mold | Yes | Rinse in distilled water, air dry flat | Within 2 hours |
| Full photo album, pages stuck together | Partial | Freeze immediately, call a professional | Within 1 hour |
| Kodachrome slides or negatives | No | Keep submerged in distilled water, call pro | Immediate |
| Framed photos stuck to glass | No | Keep frame flat, call pro for glass separation | Within 4 hours |
| Mold already visible on prints | No | Freeze, call IICRC-certified specialist | Immediate |
| Legal documents (deeds, wills, passports) | Partial | Freeze, professional lyophilization recommended | Within 2 hours |
| Large volume (100+ prints) from basement flood | No | Freeze in batches, professional freeze drying | Within 1 hour |
Why Detroit Basements Create Unique Recovery Challenges
Detroit’s climate creates a specific set of conditions that make photo and document recovery harder here than in drier cities. Summer humidity in the metro area regularly exceeds 70 to 80 percent, which means wet items left in a basement will not air dry the way they would in, say, Phoenix or Denver. Mold establishes itself faster. Emulsion stays soft longer. Capillary action pulls contaminated water deeper into paper fibers.
Basement flooding in neighborhoods like Jefferson-Chalmers, Delray, and parts of Warren often involves sewage backflow, which introduces bacteria and fungicides onto the surface of your photos. This is a different category of risk than clean water flooding. Photos contaminated with black water require professional decontamination before any emulsion recovery work begins.
Mold is the other major factor. Detroit’s older housing stock — especially homes built before the 1960s in areas like Hamtramck and Highland Park — often has existing mold in the basement environment. A flood event introduces moisture that activates dormant mold spores almost immediately. If your flooded basement already had a musty smell before the water came in, you are dealing with a compounding problem. Our breakdown of why bleach won’t fix your Ferndale basement mold explains why surface treatments are not enough in these situations.
Long-Term Storage After Recovery — Protecting What You Saved
Once your photos and documents are dry, the recovery is not finished. Putting them back in the same cardboard boxes in the same basement puts everything at risk again. Detroit gets significant seasonal flooding. It will happen again.
Invest in archival-quality storage. Archival sleeves made from polypropylene or polyethylene keep prints from sticking together and protect against humidity. Acid-free boxes rated for long-term storage prevent the chemical degradation that destroys photos over time.
For truly irreplaceable photos and documents, digitization is the most reliable long-term protection. A high-resolution scan stored in at least two separate locations — a physical external drive plus a cloud backup — means a future flood cannot destroy what you already lost once.
If you experienced water damage beyond just photos — to flooring, walls, or carpeting — you will want to address those issues at the same time. Our guide on saving hardwood floors after a significant water leak covers what can be salvaged and what needs to be replaced, and if you have wet carpet, our piece on deciding whether wet carpet can be saved or needs to go will help you make that call quickly.
Professional Document Recovery Services in Detroit
When the volume of wet photos is too large to process by hand, when mold is already present, or when the items involved are legally or financially critical, professional recovery is the right path. An IICRC-certified water damage restoration company with photo and document recovery experience will use commercial freeze drying chambers (lyophilization units) to remove moisture from frozen materials without passing through a liquid phase. This process preserves emulsion integrity far better than any DIY drying method.
When you call a restoration company for a flooding event, ask specifically whether they offer document and photo recovery services or whether they partner with a specialty firm that does. Not every water damage company has this capability in-house.
If your flood event is also triggering an insurance claim — which it should be if you experienced basement backflow or pipe failure — getting professional documentation of the damage to your photos and documents is important. Insurers in Michigan will often cover personal property losses including photographs under the right policy conditions. Our article on filing a successful water damage insurance claim for your Corktown home walks through what that process looks like in detail.
If you are in the Detroit metro and you are dealing with a flooded basement right now, call a local IICRC-certified water restoration company today. The longer you wait, the more you lose. Your photos and documents can be saved — but only if you act in the next few hours.