

Your Palmer Woods home was built to last generations. The brick exterior, the deep mortar joints, the craftsmanship from an era when Detroit was building for permanence. But right now, that window AC unit dripping down your facade is working against everything those original masons put together.
This is one of the most common sources of slow-burn water damage we see in Detroit’s historic brick neighborhoods. It doesn’t announce itself with a burst pipe or a flooded basement. It just drips. Day after day. Until one season the mortar starts crumbling, white stains appear on your brick, or you notice a musty smell near your window frame that won’t go away.
Why Window AC Units Drip Onto Your Brick in the First Place
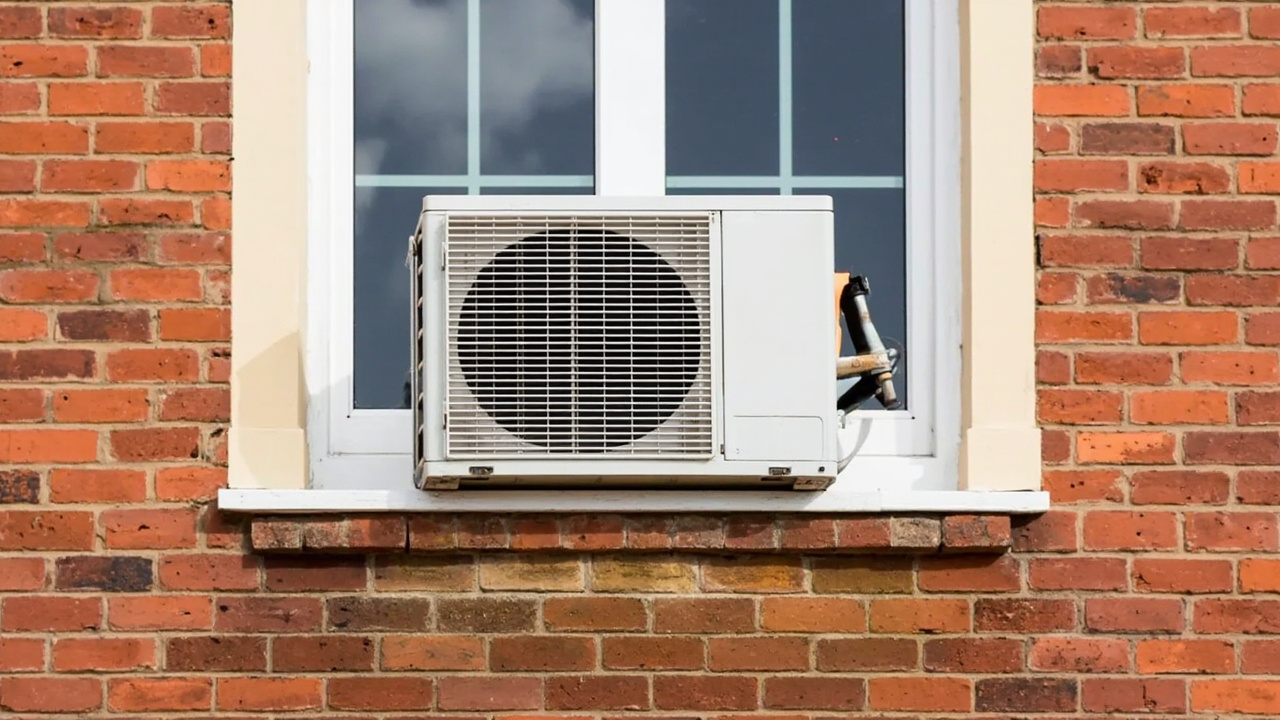
A window air conditioner removes heat from your interior air and expels it outside. That process creates condensate, which is water pulled directly out of your indoor air. On a humid Detroit summer day, a standard 10,000 BTU window unit can produce anywhere from 1.5 to 3 gallons of condensate per hour during peak operation.
Window AC units are designed with a slight backward tilt so that condensate drains away from the interior toward the exterior. Most manufacturers specify a tilt of roughly 1/4 inch for every 12 inches of unit depth. When homeowners or installers skip this step, the water either pools inside the unit or drains straight down the exterior wall instead of being flung off the back by the fan.
There are three main reasons your unit might be dripping onto your brick:
- Improper or zero rear tilt, causing water to run forward or pool at the front lip and spill down the facade
- A clogged condensate drain pan, which overflows in any direction once it fills
- Frozen evaporator coils that melt rapidly when the unit cycles off, releasing a large burst of water at once rather than a slow, manageable trickle
Each of these produces the same outcome for your masonry. Repeated, sustained moisture contact on the brick face below the unit.
How Water Actually Damages Detroit Brick
Brick looks solid, but it is a porous material. Detroit homes built between the early and mid-20th century, which covers most of Palmer Woods, Indian Village, and Boston-Edison, typically used clay brick with lime-based mortar. Both materials absorb moisture through capillary action, drawing water inward through microscopic pores even against gravity.
Once water gets inside the masonry assembly, three specific failure patterns develop over time.
Spalling
Spalling happens when water penetrates brick and then freezes. Water expands roughly 9% when it transitions to ice. Detroit’s freeze-thaw cycle is punishing. It’s common to see 30 or more freeze-thaw events in a single Michigan winter. Each cycle forces the brick face to flake, chip, or pop off entirely. Once the outer face of a brick is gone, the inner material erodes much faster.
Efflorescence
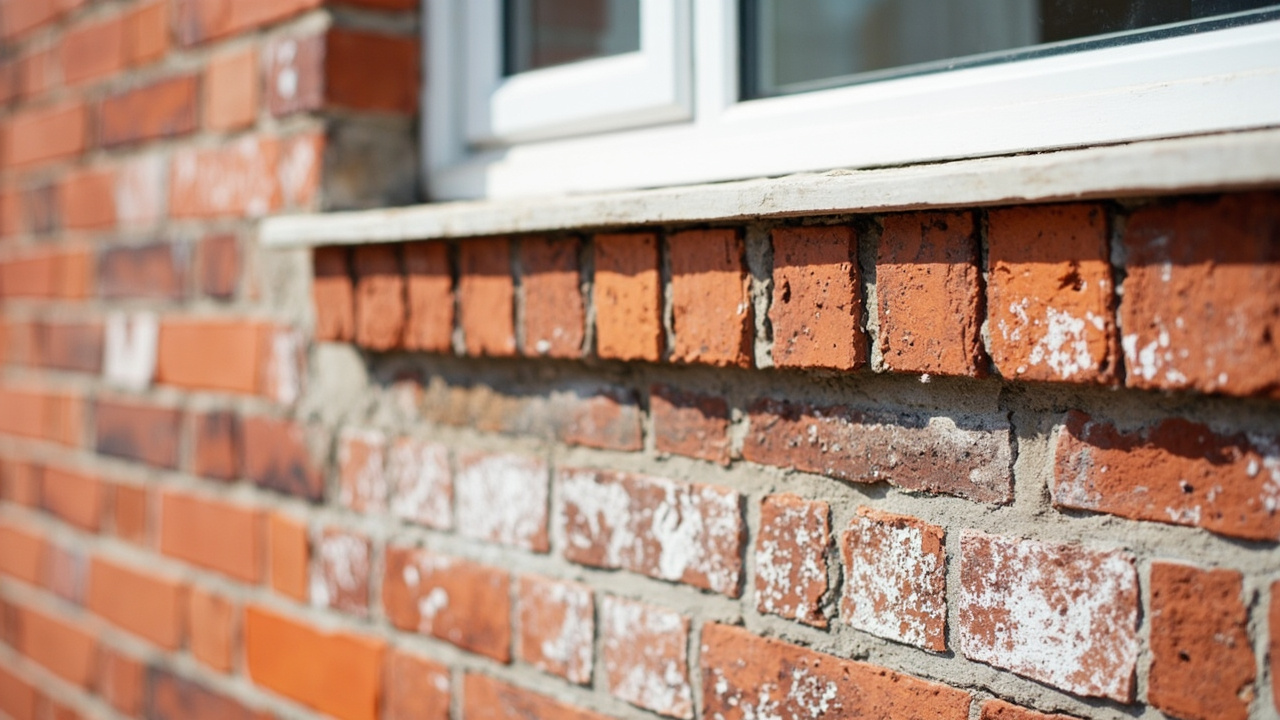
That chalky white film you see on brick walls is efflorescence. It’s not paint. It’s salt. As water moves through masonry, it dissolves soluble salts from the brick and mortar. When the water evaporates at the surface, it leaves those salts behind as a white crust. Efflorescence below a window AC unit is a reliable indicator that water has been penetrating that section of wall for an extended period. It doesn’t damage the brick by itself, but it tells you that moisture migration is active and ongoing.
Mortar Joint Deterioration
Mortar joints are almost always the first point of failure in older Detroit masonry. Lime mortar is softer than the brick itself by design, meant to flex slightly and sacrifice itself before cracking the brick. But lime mortar is also more porous and more vulnerable to sustained moisture exposure. When condensate drips repeatedly onto the same section of wall, the mortar joints in that zone soften, erode, and eventually crumble. Open mortar joints allow water to bypass the brick face entirely and penetrate directly into the wall cavity.
What Happens Inside the Wall When Moisture Gets Past the Brick
Palmer Woods homes are masonry wall construction, meaning the brick is structural, not decorative cladding. Behind the brick is typically a layer of air space or building felt, wood sheathing, framing, insulation, and interior drywall. According to the EPA’s mold guidelines, mold growth begins on organic materials within 24 to 48 hours of sustained moisture exposure when temperatures are between 40 and 100 degrees Fahrenheit.
Your wall cavity sits in that temperature range for most of the year. When water gets through deteriorated mortar joints, it contacts the wood framing and insulation. Neither material dries quickly in an enclosed cavity. Mold colonizes the wood, sheathing, and insulation before you ever see a stain on your interior drywall.
By the time you notice a musty smell near the window or see discoloration on the interior wall surface, you are usually dealing with an established mold colony that has been growing for weeks or months. At that point, a simple surface cleaning won’t resolve the problem. If you’ve already tried cleaning and the smell returns, read our breakdown of why bleach won’t fix mold problems for context on why surface treatments fail with cavity mold.
Detroit’s Climate Makes This Problem Significantly Worse
Detroit sits in the Great Lakes climate zone, which means high humidity summers followed by hard freeze winters. The combination is particularly destructive for masonry that has absorbed moisture from an AC unit all summer long.
A brick section that absorbs condensate from June through September enters the winter already saturated. The first hard freeze in November doesn’t just affect surface moisture. It freezes water that has wicked deep into the wall assembly through capillary action. The internal expansion pressure from that freeze is what drives spalling and mortar joint cracking.
Wayne County experiences an average of 30 to 40 freeze-thaw cycles each winter. Each one applies mechanical stress to already-compromised masonry. A wall that looked fine in October can show significant spalling by March.
| Stage | Timeframe | Visible Signs | Structural Risk |
|---|---|---|---|
| Initial Moisture Contact | First season | Darkened brick surface, minor efflorescence | Low |
| Mortar Softening | 1 to 2 seasons | Heavy efflorescence, soft mortar texture | Low to Moderate |
| Mortar Joint Erosion | 2 to 3 seasons | Visible mortar gaps, water staining on interior walls | Moderate |
| Spalling and Cavity Infiltration | 3 to 5 seasons | Brick face fracturing, interior mold, musty odor | High |
| Structural Compromise | 5 or more seasons | Visible wall deflection, open cracks, wet interior framing | Severe |
Diagnosing Whether Your AC Unit Is the Source
Before calling anyone, confirm the source. Stand outside your home after the AC has run for at least two hours on a warm day. Look at the brick directly below and beside the unit. You’re checking for active dripping or running water on the face of the brick, dark wet staining on the mortar joints below the unit, and white efflorescence deposits concentrated in that zone.
Also check inside. Run your hand along the window frame and the interior wall surface on either side of the unit. Soft drywall, paint bubbling, or any visible discoloration means moisture has already moved into the interior assembly.
The IICRC S500 standard for water damage restoration classifies wall cavity moisture infiltration as Category 1 or 2 depending on the source, and the remediation scope is significantly different at each level. Understanding which category your situation falls into matters for how remediation gets scoped and what your insurance may cover.
Immediate Steps You Can Take Before Calling a Professional
If you catch this problem early, a few DIY steps can stop the active damage while you arrange for professional assessment.
- Turn the unit off and remove it from the window if safe to do so.
- Check the tilt of the unit using a level. The exterior end should sit lower than the interior end by at least 1/4 inch across the depth of the unit.
- Inspect the drain pan inside the unit. A pan full of standing water or visible algae and debris is clogged and needs cleaning before reinstallation.
- Look at the evaporator coil (the inside-facing metal fins). A solid block of ice on the coil indicates an airflow restriction or a refrigerant issue. Do not reinstall a frozen unit.
- Photograph every area of the exterior brick that shows staining, efflorescence, or mortar damage. These photos are important for any insurance documentation.
For documentation guidance, our article on getting your Detroit home insurance to pay for water restoration walks through exactly what adjusters look for and how to document slow-intrusion damage effectively.
Comparing DIY Fixes Against Professional Restoration Scope
| Problem | DIY Solution | Limitation | Professional Scope |
|---|---|---|---|
| Improper AC tilt | Adjust mounting bracket | Stops active drip only | Inspects existing wall damage from prior drainage |
| Clogged drain pan | Clean with diluted bleach solution | Surface-level fix, does not address wall absorption | Moisture mapping of wall cavity using thermal imaging |
| Efflorescence staining | Scrub with diluted muriatic acid | Cosmetic only, does not seal brick | Assesses whether staining indicates active capillary draw |
| Soft or crumbling mortar | DIY repointing with pre-mixed mortar | Wrong mortar hardness can accelerate brick damage | Selects correct lime-to-Portland ratio for historic brick |
| Interior mold near window | Surface spray and wipe | Does not address colony in wall cavity | Full cavity inspection, containment, and remediation |
What Restoration Professionals Actually Do for This Type of Damage
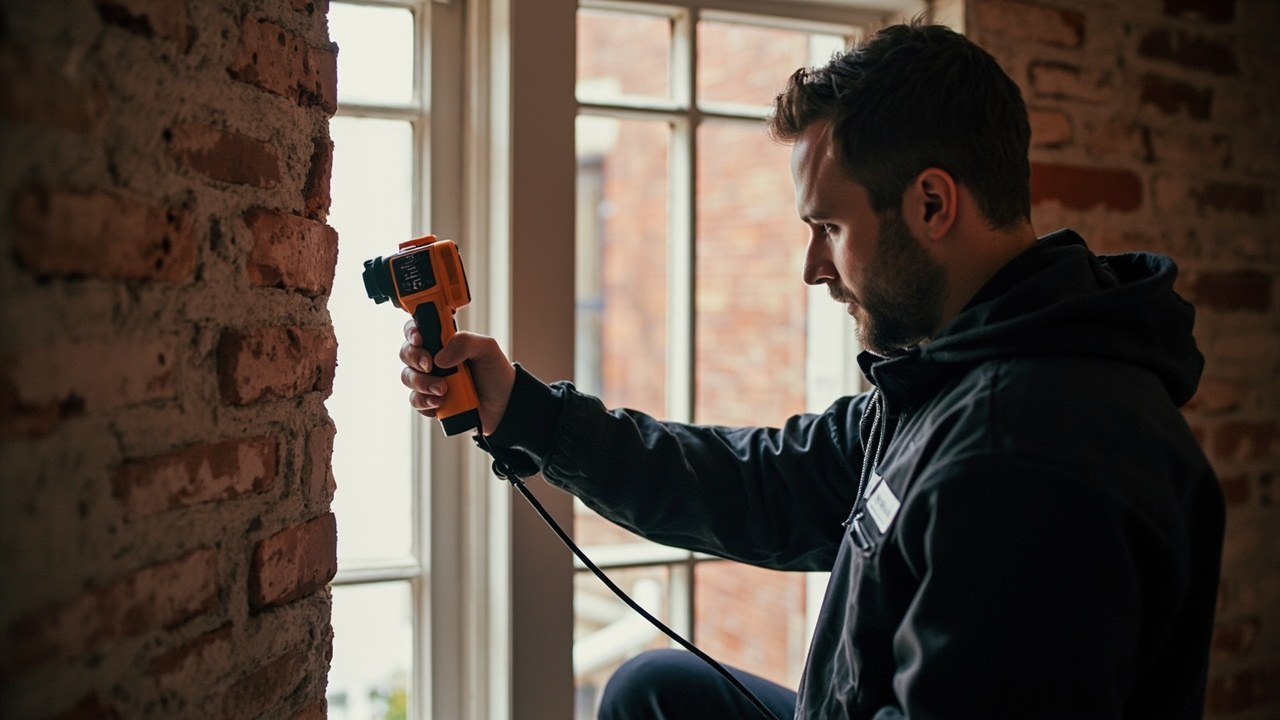
When our crew assesses AC-related water damage on a Detroit brick home, we start with moisture mapping. We use thermal imaging cameras and pin-type moisture meters to identify exactly how far moisture has migrated into the wall assembly without opening anything up first.
If the moisture readings show saturation in the wall cavity, we establish the drying scope. For a masonry wall, that means controlled drying using desiccant dehumidification and potentially directed low-profile drying mats placed against the brick face. Masonry dries slowly. Expect a drying phase of 4 to 7 days minimum for a wall that has been absorbing moisture for more than one season.
If mold is present in the cavity, the remediation protocol under IICRC S520 standards requires physical removal of contaminated organic materials, which means opening the interior drywall, removing affected insulation and sheathing, HEPA vacuuming the framing, and treating remaining surfaces before the wall is rebuilt. This is not a wipe-down job.
Repointing the exterior mortar joints is the final step, and it happens only after the wall assembly has fully dried and been cleared. Sealing wet masonry traps moisture inside and accelerates the degradation you were trying to stop.
Insurance Coverage for This Type of Damage in Michigan
AC condensate damage falls into a gray zone in most homeowner’s insurance policies. Coverage often depends on whether the damage is categorized as sudden and accidental versus gradual and ongoing. Condensate drip damage that developed over multiple seasons typically gets disputed as a maintenance issue by adjusters.
The way you document and present the claim matters. If you can demonstrate that the unit malfunctioned (frozen coils, clogged drain pan failure) rather than was simply installed improperly over years, the claim framing changes. Our guide on filing a successful water damage insurance claim covers exactly how to present this type of claim to your adjuster.
Protecting Your Palmer Woods Brick Long Term
Once your wall has been dried, remediated, and repointed, a few simple measures prevent recurrence. Check your window AC unit’s tilt at the start of every cooling season. Clean the drain pan and drain hole before first use each year. If the unit is more than 10 years old, consider whether a replacement with better drainage engineering makes sense before another season of condensate accumulation on your brick.
For Palmer Woods, Boston-Edison, and other historic Detroit districts with masonry construction, applying a penetrating silane-siloxane water repellent to the exterior brick after repointing adds meaningful protection against moisture absorption without trapping vapor or altering the brick appearance. This is different from a surface sealer. It does not change how the wall looks, but it dramatically reduces capillary absorption.
If your situation also involved water reaching interior flooring or subfloor areas, the drying timeline and approach differs from wall-only drying. You can review how we approach floor-level water damage in our article on saving hardwood floors after water damage, which covers the same principles applicable to Detroit-area homes.
Get a Free Moisture Assessment for Your Detroit Home
If you are seeing white staining, crumbling mortar, or a musty smell near a window where an AC unit has been installed, do not wait for the problem to show up on your interior walls. By that point, you are dealing with a significantly larger remediation scope than if the moisture is caught in the early stages.
We provide free moisture assessments for homeowners in Palmer Woods, Indian Village, Sherwood Forest, Boston-Edison, and throughout greater Detroit and Wayne County. We show up with thermal imaging and give you a clear picture of what is happening inside your wall before we recommend any scope of work. Call us or request an assessment online and we will get someone to your home within 24 hours.
{
“@context”: “https://schema.org”,
“@type”: “BlogPosting”,
“headline”: “Why Your Palmer Woods Window AC Unit Is Quietly Destroying Your Brick Exterior”,
“description”: “Window AC units tilted the wrong way cause serious brick water damage in Detroit homes. Learn the signs, risks, and when to call a restoration specialist.”,
“wordCount”: 2183,
“datePublished”: “2026-06-16T08:22:00.000Z”,
“dateModified”: “2026-06-16T08:22:00.000Z”,
“inLanguage”: “en-US”,
“mainEntityOfPage”: {
“@type”: “WebPage”,
“@id”: “https://ironwoodwaterdamagerestorationdetroit.com”
},
“publisher”: {
“@type”: “LocalBusiness”,
“name”: “Ironwood Water Damage Restoration Detroit”,
“url”: “https://ironwoodwaterdamagerestorationdetroit.com”
},
“author”: {
“@type”: “Organization”,
“name”: “Ironwood Water Damage Restoration Detroit”,
“url”: “https://ironwoodwaterdamagerestorationdetroit.com”
},
“image”: {
“@type”: “ImageObject”,
“url”: “https://ironwoodwaterdamagerestorationdetroit.com/wp-content/uploads/2026/03/how-improperly-tilted-window-ac-units-are-damaging-1.jpg”
}
}
{
“@context”: “https://schema.org”,
“@type”: “LocalBusiness”,
“name”: “Ironwood Water Damage Restoration Detroit”,
“url”: “https://ironwoodwaterdamagerestorationdetroit.com”,
“address”: {
“@type”: “PostalAddress”,
“addressLocality”: “Detroit”
},
“areaServed”: {
“@type”: “City”,
“name”: “Detroit”
}
}
{
“@context”: “https://schema.org”,
“@type”: “BreadcrumbList”,
“itemListElement”: [
{
“@type”: “ListItem”,
“position”: 1,
“name”: “Home”,
“item”: “https://ironwoodwaterdamagerestorationdetroit.com”
},
{
“@type”: “ListItem”,
“position”: 2,
“name”: “Blog”,
“item”: “https://ironwoodwaterdamagerestorationdetroit.com/blog”
},
{
“@type”: “ListItem”,
“position”: 3,
“name”: “Why Your Palmer Woods Window AC Unit Is Quietly Destroying Your Brick Exterior”
}
]
}
{
“@context”: “https://schema.org”,
“@type”: “Service”,
“serviceType”: “Water Damage Restoration”,
“provider”: {
“@type”: “LocalBusiness”,
“name”: “Ironwood Water Damage Restoration Detroit”,
“url”: “https://ironwoodwaterdamagerestorationdetroit.com”
},
“areaServed”: {
“@type”: “City”,
“name”: “Detroit”
},
“description”: “Window AC units tilted the wrong way cause serious brick water damage in Detroit homes. Learn the signs, risks, and when to call a restoration specialist.”
}